November 1, 2012
Erlang was created to run on a variety of systems. Riak (written in Erlang) was created as a fault-tolerant distributed datastore, able to run on commodity hardware. Raspberry Pi is the culmination of these two points, brought to an absurd level: an embedded(ish), very inexpensive ($35) commodity computer. I thought it might be fun to create a Riak cluster on a set of Pis I had lying around.
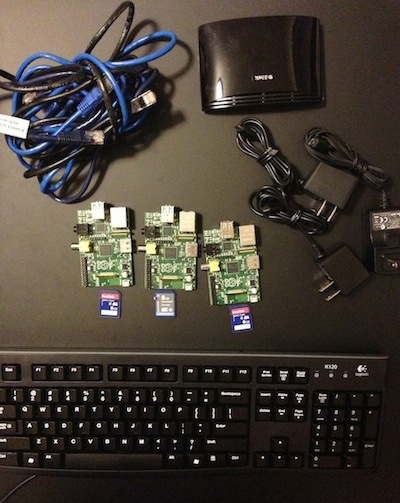
Here’s what you’ll need to build your own RiakPi cluster:
- N Raspberry Pis
- N SD card, 4+ GB
- N CAT5 cables
- N 5V, 700-1200 mA micro USB powersource (the kind used by many cellphones)
- 1 really cheap, non-fancy USB keyboard
- 1 monitor/tv with HDMI input
- 1 HDMI cable
- 1 Hub, Switch, or Router
- 1 Laptop/Desktop with an SD card slot

If you only have 1 Pi, you can still install Riak, but clearly not create a cluster. For the rest of this post, I’ll assume N=3.
It may seem like a lot of parts. However, except for the RPis, you can find most of this stuff lying around RadioShack, or your local reclaimed electronics equipment store, fairly inexpensively.
Installing Riak on Raspberry Pi
Step 1: Install Raspbi
Get your laptop (or desktop) and insert your SD card, after you download the Raspbian image (the current release is “wheezy”).
Unzip the download, and you should have an img file.
You’ll need to unmount the (probably) default partition your SD card started with, then write the image to the device. There are several detailed instructions for many operating systems on elinux.
I have a Mac running OSX, so I did the following. Be extra careful with the device names, or else you might just flash your hard drive if you get it wrong. Warning: be very, very careful here.
1. Find the device name of the SD’s partition
bash

df -h
2. unmount that partition
bash

sudo diskutil unmount /dev/disk1s1
3. Get the actual device name (which is just the disk number, minus the s1, prefixed with r. In my case it was /dev/rdisk1.
4. The flag if is the input file, and of is the output device (the SD card)
bash

sudo dd bs=1m if=~/Downloads/2012-08-16-wheezy-raspbian.img of=/dev/rdisk1
5. Eject the card
bash

sudo diskutil eject /dev/rdisk1
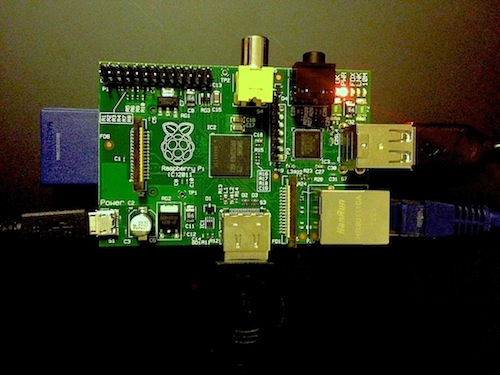
Step 2: Plug everything in so it looks like this
Plug your shiny new SD card into your RPi. In fact, why not just plug everything in? Plug the power in last, or you’ll be racing against the boot up process trying to connect devices.
Simply plugging in the Pi will turn it on.
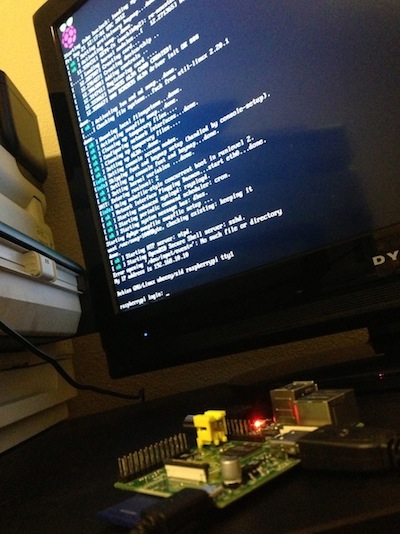
It should look something like this super hip Instagram photo.

Step 3: Boot up and setup
If everything booted up, you should see a Blue Screen of Life.
The first task I recommend is configuring your keyboard. Since Raspberry Pi is from the UK, Raspbian is set up with UK defaults (which, as an American, this came as quite a shock since everything is usually set up for me all the time).
The next thing you’ll want to do is expand the root partition to take up the full SD space. If you really wanted to make a production ready server you’d probably want to make a separate partition to store the Riak data… but if you wanted a production system you wouldn’t be installing on a Raspberry Pi anyway.
If you like, try upgrading raspi-config. This isn’t necessary, but I like to keep current. You’ll certainly need an internet connection to do so.
Then reboot. You can just unplug it. At this point I wouldn’t worry about file corruption. If the thought bothers you, you can run sudo shutdown now, then unplug.
When the server restarts, just select “finish” if the config screen launches again.

Step 4: Install esl-erlang (R15B02, Raspian)
At this point, get ready to start waiting. RPi isn’t exactly a big iron machine, and SD cards are not fast storage, so the combination can be maddeningly sluggish. You might want to have a book handy.
Now that all of that housekeeping is out of the way, it’s time to get cracking on some Riak. The first thing you’ll need, however, is Erlang. Thankfully, the awesome Erlang Solutions folks created a Raspbi distro, which was way easier than the first two weeks when I tried to create my own build. So unless you’re masochistic, I suggest using theirs.
First, add the following line to your /etc/apt/sources.list file. Luckily, vi is installed.
bash

sudo vi /etc/apt/sources.list

deb http://binaries.erlang-solutions.com/debian wheezy contrib
Then add the Erlang Solutions public key for apt-secure.
bash

wget -O - http://binaries.erlang-solutions.com/debian/erlang_solutions.asc | sudo apt-key add -
Update your apt-get package list, and then install esl-erlang.
bash

sudo apt-get update

sudo apt-get install esl-erlang
Once erlang is installed, type erl to test. I found that I received a segfault unless I restarted once after install.
If you are prompted for a password, the login/password is pi/raspberry.
Step 5: Install Riak from Source
With Erlang installed, now we move onto Riak proper. First thing is to download and extract Riak 1.2.1.
bash

curl -O http://downloads.riak.com.s3-website-us-east-1.amazonaws.com/riak/CURRENT/riak-1.2.1.tar.gz

tar zxvf riak-1.2.1.tar.gz

cd riak-1.2.1
Before we can actually install Riak using Rebar, we’ll first need to install git. Rebar uses git to download Riak’s dependencies.
bash

sudo apt-get install git
With git in place, run make a release version and let Rebar do its stuff.
bash

make rel
Once your Riak release is installed, start up riak:
bash

./rel/riak/bin/riak start
You can test that it’s started and receiving requests by curling /ping.
bash

$ curl http://localhost:8098/ping

OK
$ curl -XPUT http://localhost:8098/riak/hello/fr -d ‘Allo’
$ curl http://localhost:8098/riak/hello/fr
Allo
It’s worth nothing that the Raspberry Pi only has 256M of RAM. So feel free to tweak some of the default settings in etc/app.config.
Step 6: Rinse and Repeat
At this point you should have Riak installed on a Raspberry Pi. To install on the remaining two, you can either clone the SD card image to SD cards, or you can install Riak from scratch onto those cards following the instructions above. Copying SD images can be slow, so I couldn’t quite recommend one over the other.
Build a Cluster
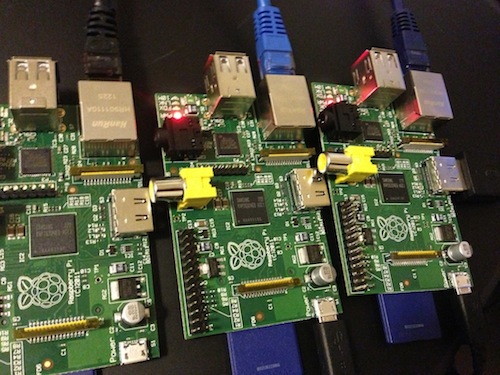
Once you have three working cards, let’s network the Pis into a Riak cluster.

Step 6: A Little Network
Before tackling this part, I’d stop Riak. We’ll fire it up when our network is functional.
You can plug your Pis into a router. They’re set up for DHCP by default so you should be good to go. You can largely skip this section.
However, if you’re cheap like me, you can plug them into a switch or hub, and do a bit of configuration.
Change the /etc/network/interfaces file to have the following settings:
bash

auto eth0

iface lo inet loopback

iface eth0 inet static

address 192.168.10.10

netmask 255.255.255.0

network 192.168.10.0

broadcast 192.168.10.255
Then restart the network.
bash

sudo /etc/init.d/networking restart
You should see your network lights flash off then on.
If you run ifconfig, your eth0 and lo values should be what you expect.
If for some reason that didn’t work, try.
bash

sudo ifconfig eth0 down

sudo ifconfig eth0 up
Then plug your keyboard and monitor into your other Pis, and repeat for the remaining two. But this time, give each card its own successive IP address (192.168.10.11, 192.168.10.12).
You should now be able to ping the other cards.
bash

ping 192.168.10.11
The LNK lights on your cards should blink for each ping.
There are more creative ways to configure a network, obviously, but this was fine for my three little cards.
Step 7: Make Riak Nodes
Although each RPi has Riak installed, they are not configured with the new network settings which allow the Erlang VMs to communicate with each other.
Change to your riak install directory ($RIAK_HOME/rel/riak).
bash

vi etc/vm.args
Replace all 127.0.0.1 with 192.168.10.10, or whichever your Pi’s IP.
vi etc/app.config
Replace all 127.0.0.1 with 192.168.10.10/11/12.
Start riak with bin/riak start and check that it’s running with /bin/riak pong. If you have trouble getting Riak to start, you may have better luck by deleting your data directory.
Step 8: Cluster Time
Now each of your RPis is an official Riak node. It’s time to build a cluster!
Whatever RPi node you happen to be connected to, choose the two other nodes to join. Since I’m connected to 192.168.10.12, I typed the following:
bash

./bin/riak-admin cluster join riak@192.168.10.10

./bin/riak-admin cluster join riak@192.168.10.11
./bin/riak-admin plan
./bin/riak-admin commit
./bin/riak-admin
You can see what percentage of the ring each node has by typing, which will give you a (not exactly evenly) divided 33% for each.
bash

./bin/riak-admin member-status
That’s it. Now you can throw some commands at one of the nodes, and the value should be available from any other node. Go ahead and try it.
I posted a value to the druplets buckets (a druplet is the little nodule on a raspberry), then listed the keys from a different IP.
bash

curl -XPOST http://192.168.10.10:8098/riak/druplets -d 'YUM'

curl http://192.168.10.12:8098/riak/druplets?keys=true | json_pp
You should expect the new key to be added.
Note that cluster isn’t fit for any purpose in its current form. If I were serious about a production Pi cluster, I’d connect a better drive than an SD card (which could be anything), I’d certainly alter the app.config setting, and probably some other customer hacks, like removing JavaScript entirely.
I’d love to hear what you do with this.

